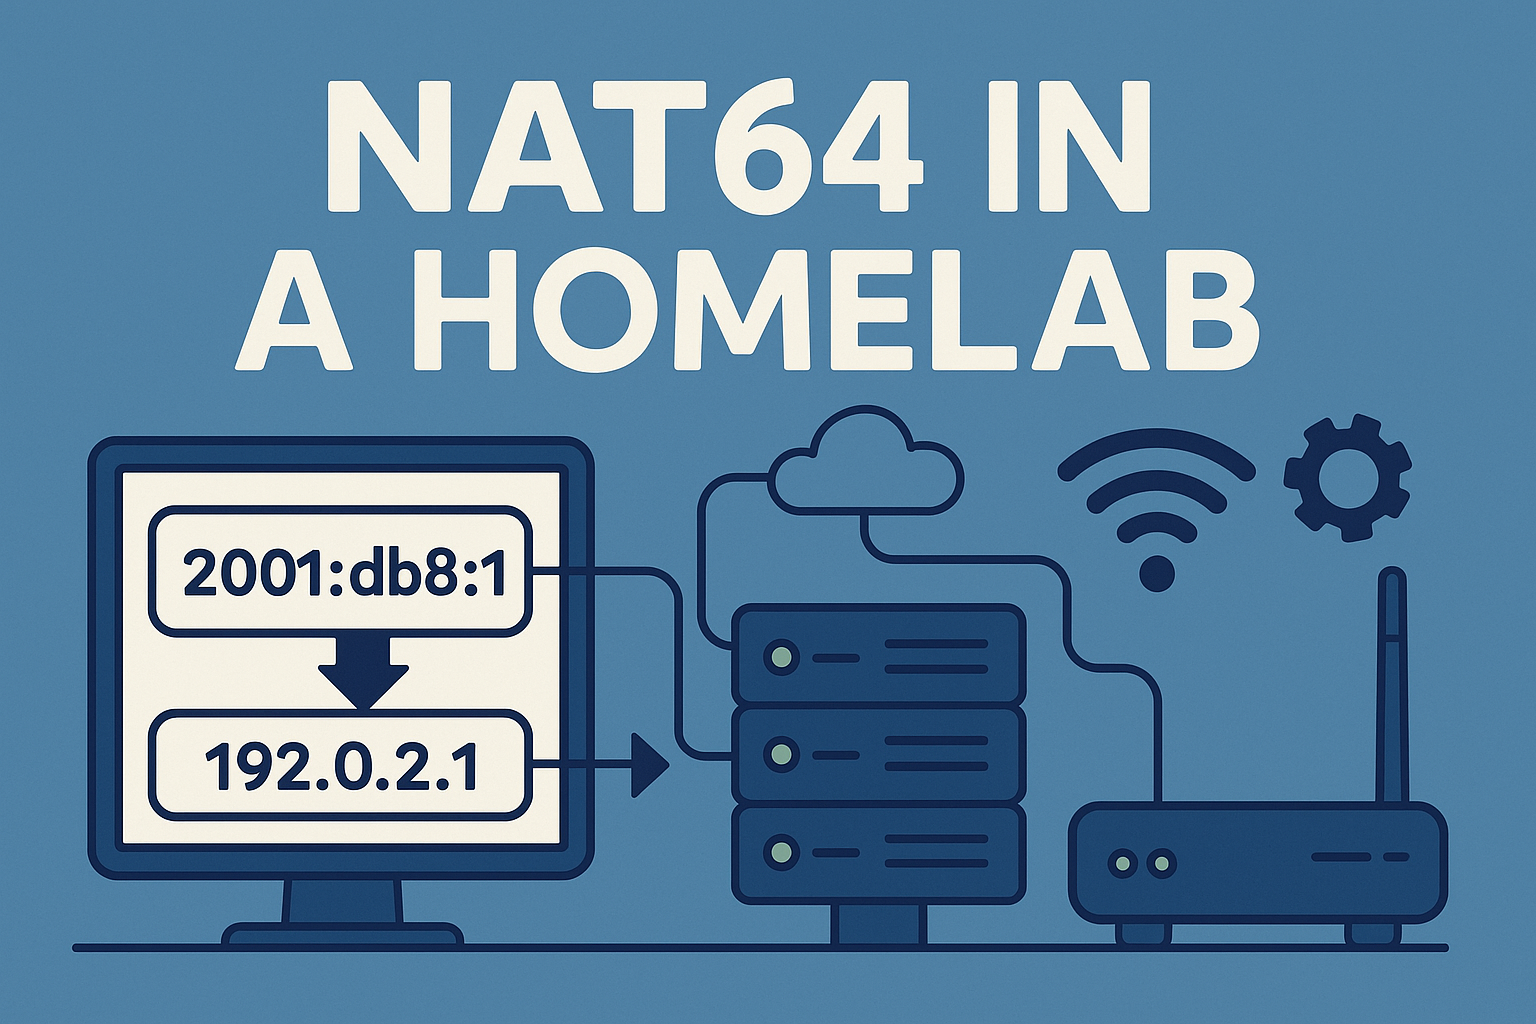
As discussed in the previous post, I am currently making some modifications to my homelab. As a part of this process, I am looking at NAT64 solutions again. I am currently running Tayga on OpnSense, but want to move to NAT64 with a dedicated VM. This post will be going through what NAT64 is, how clients interact with it, a comparison of different implementations and finally setting up my chosen implementation.
What is NAT64 and why do we need it?
We need NAT64 in IPv6 mostly and IPv6 only networks because there are still many sites and services on the internet that don’t support IPv6. NAT64 solves this problem by mapping every single IPv4 address to a unique IPv6 address, which can be used for communication with those addresses.
This doesn’t magically fix client devices that don’t support IPv6, but it enables devices with IPv6 support to start going IPv6 only. Mobile devices, and some desktop operating systems (primarily macOS) support IPv6 only operations particularly well, due to having built-in CLAT implementations. However, we will dive deeper into this later.
How does NAT64 work?
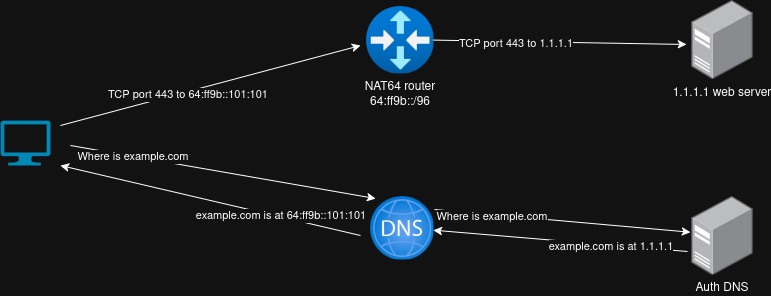
All NAT64 implementations map an IPv6 address into a /96 IPv6 prefix by taking every single bit of the IPv4 address and adding it to the end of the IPv6 address. This means that for example, an IPv4 address ‘1.1.1.1’ could become ‘64:ff9b::101:101’, or ‘96.7.128.175’ becomes ‘64:ff9b::6007:80af’.
But where does the 64:ff9b:: come from? Well, you can technically use any /96 IPv6 prefix, but 64:ff9b::/96 is reserved to NAT64. Using 64:ff9b::/96 does have some pros and cons:
- If you want to use publicly avalible DNS64 services, this is the prefix they assume your NAT64 implementation will be using.
- It is obvious that traffic is going through NAT64 if you see an 64:ff9b::/96 address.
- Some NAT64 implementations might not allow translating traffic to RFC1918 destinations, if you are using 64:ff9b::/96
There can be some diffrences between NAT64 implementations, but we will look more at that in the comparison section below. For homelab purposes i would also argue it makes quite a diffrence if you are managing the NAT64 software directly, or if you are using it as part of an intigrated solution like running NAT64 in OpnSense.
Client interaction with NAT64
It might be worth briefly looking at how clients interact with NAT64 before looking at the solutions themself. The two main ways are DNS64 and CLAT (also known as 464XLAT), which are not mutually exclusive, but can be used in combination.
DNS64
DNS64 essentially works by lying to the client, The DNS server sends A and AAAA queries for a given domain. If no AAAA record is found, it maps the A record address into a NAT64 address, for this reason it is very important that the DNS64 server knows the correct NAT64 prefix.
The advantage of using DNS64 is quite clear, it doesn’t require any changes to your clients. But there are unfortunately a few drawbacks:
- If used standalone without CLAT on the clients, it doesn’t offer any fallback in case a service has a AAAA record, but the IPv6 implementation of the site for some reason doesn’t work. To be fair, this is not a flaw in DNS64 itself, but just a consequence of purely relying on DNS64.
- It doesn’t offer any way of translating IPv4 littrals. While generally not a huge problem, it is a problem in some cases, most notably Discord voice chat.
- If your endpoints are doing DNSSEC validation, it will detect that the DNS server is lying to you and reject the response.
464XLAT
464XLAT introduces a new component, a Customer site translater called CLAT. The CLAT is most often located on the endpoint device itself, but it doesn’t have to be. If as an example you have 5G router on an IPv6 Only mobile network, you probably have a CLAT function built into your router. CLAT essentially just allows the translation of IPv4 packets into IPv6 packets using the NAT64 prefix.

The pros of this is that IPv4 works no matter if you have DNSSEC, IPv4 littrals, or whatever else. The cons are that it requires a new component usually located on the endpoint device itself. Mobile devices generally have very good CLAT implementations, apple have also included the Iphones CLAT implementation in macOS. Microsoft have commited to CLAT for all network types in Windows 11, but they commited to that over a year ago, and we haven’t heard anything since.
But how do CLAT implementations even know what NAT64 prefix to use? There are generally two ways of doing this.
- The first and preferred way is to use PREF64 router advertisements. This option needs to be implemented per endpoint network, but it enables the router to inform the client about the NAT64 prefix when announcing the IPv6 router information.
- Another way is using DNS64. This requires the client to lookup a AAAA record for ipv4only.arpa. Per RFC7050 the response for ipv4only.arpa should be 192.0.0.170/192.0.0.171. So AAAA response would indicate NAT64 is implemted. The NAT64 prefix is found by taking the first 96 bits of the IPv6 address in the response, and using that as the NAT64 prefix. It is worth noting that the IETF is working on deprecating this method, recormending the use of PREF64 instead.
Comparing NAT64 implementations
I will focusing mostly on NAT64 implementations that are free, and easy to implement. So yes you could ask Cisco/F5/Juniper/etc for a NAT64 implementation, solution. But not everyone has access to that.
I do however have a cisco router in my homelab, so i will include that just because i could use it.
Tayga
I am currently using Tayga inside OpnSense and it has worked fine for me. From what i remember this was generally the recormended solution back when i last researched NAT64. It seems like it’s not the best option for performance, and that it has had some problems with lacking maintence.
Earlier in 2025 some new life was given to Tayga, in the form of Andrew Palardy being the new maintainer (Checkout his youtube channel if you like this kind of content)
It is ofcourse posible to setup a VM, and just run Tayga on any Linux server, but tayga is also the NAT64 option for OpnSense, and PfSense.
Jool
Jool seems to be a newer better performing option, development seems to be slow but still existing. Unlike Tayga, it runs as a kernel module. This could be why the performance is much better.
I haven’t done any performance testing but Nico Schottelius did a presentation at RIPE85 and found Jool to perform more than twice as fast as Tayga, but I haven’t tested it myself yet.
If you want an out of the box solution using Jool, it seems like Jool is the built in NAT64 option for VYOS.
Cisco IOS XE
I happen to have a fairly modern Cisco router in my lab, so I wanted to look at if i could use that. I would probably not recormend going out to buy a physical router just to use it for NAT64.
The main pro for me is that it is something that is more likely to see in a production network. Obivoiusly when running a production network, vendor support is a very important component. It also seems very easy to configure, and i am sure it would work fine. A drawback for me is power consumption. I currently don’t have any other reason to run that router 24/7, so locating NAT64 on it, would add a new source of power draw to my homelab.
My setup
Based on above mentioned options, i have decided to use Jool. The performance is defendly nice, but besides that I just wanted to try something new. As mentioned, I have experince with Tayga, but what’s the point in having a homelab if you don’t try something new and have fun with it.
Setting up Jool on Ubuntu 24.04 LTS
First start out with a clean ubuntu machine, given that Jool runs as a kernel module, I would highly recormend going with a full VM, instead of trying to make this work on an LXC container. This does not require a lot of resources I have speced mine with 1G of RAM and 1 Core. This seems to be enough for my needs.
Installing Jool
In theroy installing Jool on Ubuntu should be very easy, it is included in the default APT repository, so all you should need to do is install it from there.
# Update package repo
sudo apt update

# Install Jool
sudo apt install jool-dkms jool-tools -y
I would recormend you try the above mentioned route, but as of writing, it doesn’t work. The version of Jool in the repo is too old, and does not support the current kernel version for Ubuntu 24.04 LTS. So here is the manuel way
# Find the newest versions here: https://github.com/NICMx/Jool/releases

# Download kernel module and tools
wget https://github.com/NICMx/Jool/releases/download/v4.1.14/jool-dkms_4.1.14-1_all.deb

wget https://github.com/NICMx/Jool/releases/download/v4.1.14/jool-dkms_4.1.14-1_all.deb

# Install kernel headers
apt install linux-headers-$(uname -r)

# Install the packages
sudo dpkg -i jool-*.deb
Given that Jool runs as a kernel module, we need to load it. This example both loads it now, and makes the change persistant. But I would recormend rebooting your machine after this step, just to make sure the persistance works.
# Add Jool to list of modules loaded
sudo su -c "echo jool > /etc/modules-load.d/jool.conf"

# Restart systemd's load modules service
sudo systemctl restart systemd-modules-load

# Verify the module has been loaded
lsmod | grep jool
jool                   16384  0
jool_common           319488  1 jool
nf_defrag_ipv6         24576  1 jool
nf_defrag_ipv4         12288  1 jool
x_tables               65536  2 jool,ip_tables
Creating a service
Now let’s create a service file for Jool to start on bootup. I have created a file called /etc/systemd/system/jool.service with the following content:
[Unit]
Description=Jool NAT64

[Service]
Type=oneshot
ExecStart=/usr/bin/jool instance add --netfilter --pool6 64:ff9b::/96

[Install]
WantedBy=multi-user.target
Let’s enable and start the service:
# Reload services
sudo systemctl daemon-reload

# Enable the service
sudo systemctl enable --now jool.service

# Verify the service is running
sudo systemctl status jool.service
Verifying Jool
We can verify that the service is working correctly by checking the known instances and status of Jool:
# List known instances
sudo jool instance display

# Verify Jool is running
sudo jool instance status

# Show Jool global config
sudo jool global display
Routing
Given this guide assumes the NAT64 router is outside the normal path of traffic, we need to route the NAT64 prefix towards the machine. You can achive this in multiple ways, but the most obivious would be BGP or static routing. For simplicity I have decided to use Static routing.
I unfortunly can’t tell you exactly how to configure this routing, due to it being slightly diffrent on each router OS. But here is an example from Vyos:
set protocols static route6 64:ff9b::/96 next-hop <Your machines IP>
Final verification of Jool
Let’s try running some traffic through the NAT64 router and see if it works. To start out with, let’s use ping to test this.
# From a host on the Lan side NOT THE NAT64 ROUTER ITSELF, ping 1.1.1.1 though the nat64 prefix.
➜  ~ ping 64:ff9b::1.1.1.1
PING 64:ff9b::1.1.1.1(64:ff9b::101:101) 56 data bytes
64 bytes from 64:ff9b::101:101: icmp_seq=1 ttl=51 time=5.67 ms
64 bytes from 64:ff9b::101:101: icmp_seq=2 ttl=51 time=6.71 ms
64 bytes from 64:ff9b::101:101: icmp_seq=3 ttl=51 time=7.13 ms
64 bytes from 64:ff9b::101:101: icmp_seq=4 ttl=51 time=8.18 ms
Adding DNS64
While some hosts might automaticly discover the NAT64 router, it is unlikely. Therefore we need a DNS64 server. This might be something i built in the future, but for now i will just use a publicly avalible one. These servers assume you use 64:ff9b::/96 as your NAT64 prefix, so this is not an option if you are using a different prefix.
Here is a list of some public DNS64 servers:
| Name | Address |
|---|---|
| Google - Primary | 2001:4860:4860::6464 |
| Google - Secondary | 2001:4860:4860::64 |
| Cloudflare - Primary | 2606:4700:4700::64 |
| Cloudflare - Secondary | 2606:4700:4700::6400 |
I will be using Cloudflares in my network.
Again, this step depends on what router you are using (and your address alocation techniques). But you want to either update your router advertisements, or DHCPv6 to announce two DNS64 servers.
Once you have done that, you can use curl to test that it works
➜  ~ curl -6 -v v4.ipv6test.app

*   Trying 64:ff9b::12ad:57b:80...
* Connected to v4.ipv6test.app (64:ff9b::12ad:57b) port 80 (#0)
> GET / HTTP/1.1
> Host: v4.ipv6test.app
> User-Agent: curl/7.81.0
> Accept: */*
>
* Mark bundle as not supporting multiuse
< HTTP/1.1 200 OK
< Server: CloudFront
< Date: Sun, 13 Jul 2025 15:57:01 GMT
< Content-Type: text/plain
< Content-Length: 13
< Connection: keep-alive
< Cache-Control: no-store
< X-Cache: FunctionGeneratedResponse from cloudfront
< Via: 1.1 acf2dd107c5d6d9bebe3457b4f66431e.cloudfront.net (CloudFront)
< X-Amz-Cf-Pop: CPH50-P1
< Alt-Svc: h3=":443"; ma=86400
< X-Amz-Cf-Id: EnXaGh0GuNnz9vjirNdrCtDnTTj5grn7vGoMJiJJu3CE9rdNIYxlpQ==
< X-XSS-Protection: 1; mode=block
< Referrer-Policy: no-referrer
< Content-Security-Policy: script-src 'self'; frame-ancestors 'none'
< X-Content-Type-Options: nosniff
< Permissions-Policy: geolocation=()
<
* Connection #0 to host v4.ipv6test.app left intact
y.z.x.c%
As you can see in the top, this Ipv4 only site is accessed over ipv6 though NAT64. At the bottom we can see an IPv4 address (redacted), this is Jools outside address (or atleasted NAT’ed) outside address. So from the perspective of the server, we are an ipv4 client. But we are really using IPv6 on our end. This is exactly what we wanted to see.
Conclusion
This post has been a bit long and I hope you enjoyed it as much as I did writing it. We have covered what NAT64 is, what deployment options we have, and how to deploy it. I hope this will help you in your homelab journey, and hope you take the time to deploy ipv6 mostly in your own network. IPv6 is the future, and way too few people understand it yet.